🚀 Power BI for Beginners – Day 2 | Data Modelling, Installation & Setup

Hey everyone! 👋
Welcome back to Day 2 of my Power BI for Beginners journey.
Yesterday, we explored the basics of Power BI and understood why it’s such a powerful tool for data visualization.
Today’s session was super exciting because I learned three important things:
1. What Data Modelling is
2. How to install Power BI Desktop
3. How to create a Power BI account (ID)
Let me walk you through each step 👇
---
📌 What is Data Modelling?
Let’s start with the basics – Data Modelling.
In simple terms, data modelling is the process of connecting different tables or datasets so they can work together.
For example:
One table has Sales Data
Another table has Customer Information
We can link them using CustomerID.
This relationship helps Power BI understand how the data is connected, which makes your reports accurate and meaningful.
👉 Without proper data modelling, your Power BI reports might look flashy but could give wrong results.
---
🖥️ Installing Power BI Desktop
Now, let’s talk about the installation process. Honestly, it was super easy.
Here’s what I did:
1. Went to the official site → Download Power BI Desktop
2. Clicked Free Download (this opens the Microsoft Store)
3. Installed the application like any other software
4. Opened Power BI Desktop, and it asked me to sign in (we’ll cover that in the next step).
And that’s it – installation done ✅
---
🔑 Creating Your Power BI Account
To share or publish your reports, you’ll need a Power BI Service account.
Here’s how I created mine:
1. Went to app.powerbi.com
2. Clicked on Sign Up Free
3. Entered my work/college email and details
4. Verified my email
5. And boom – account created 🎉
“OR“
If you are a student and want to learn Power BI then you can follow these steps .
Many of you facing problem in signup because you don’t have a work email address so i got you brother !!!!!!!
1. Go to the microsoft dynamic 365 webstie and then click on “ Try For Free “ .

2. Enter any of these “Try for free“ option .
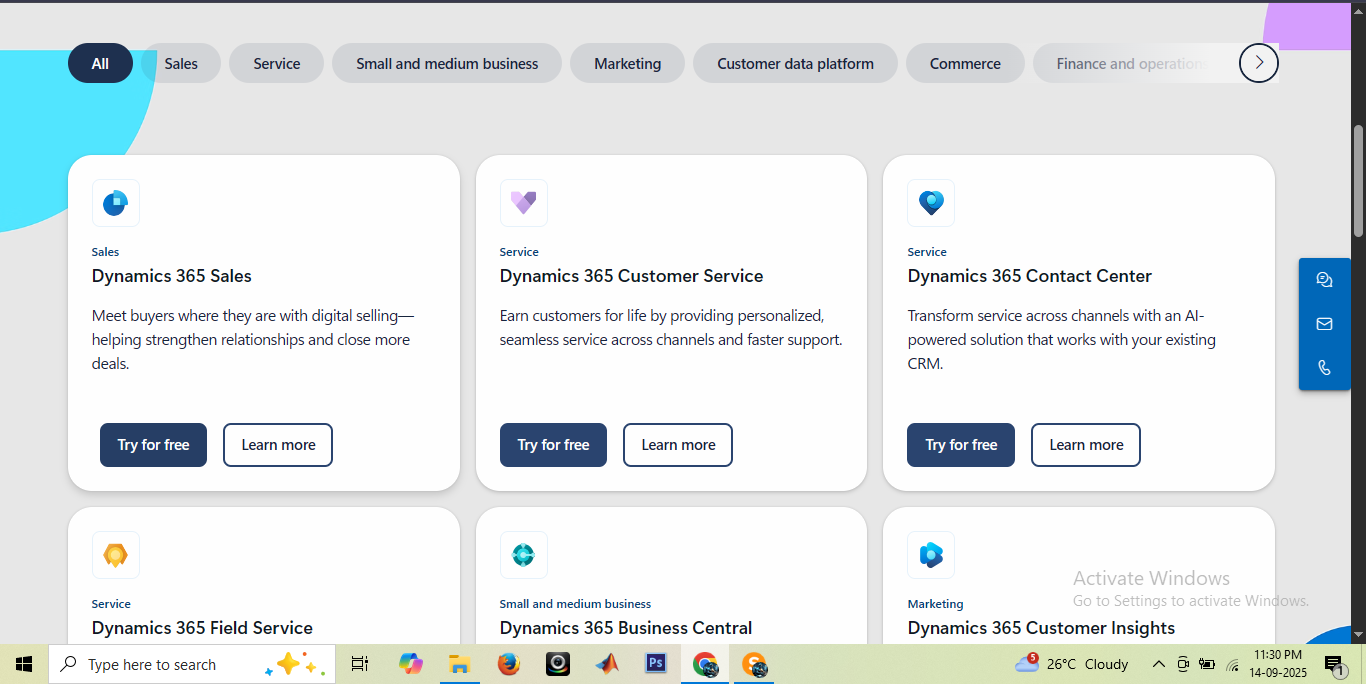
3. Enter any email you have then start your free trial.
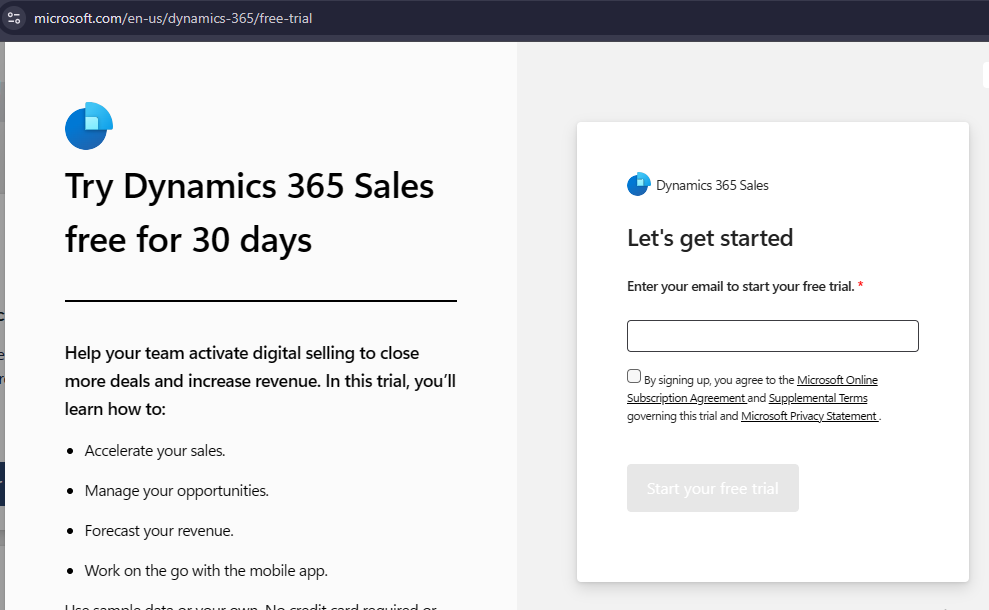
4. Now you see the option of setup a new account click on it .
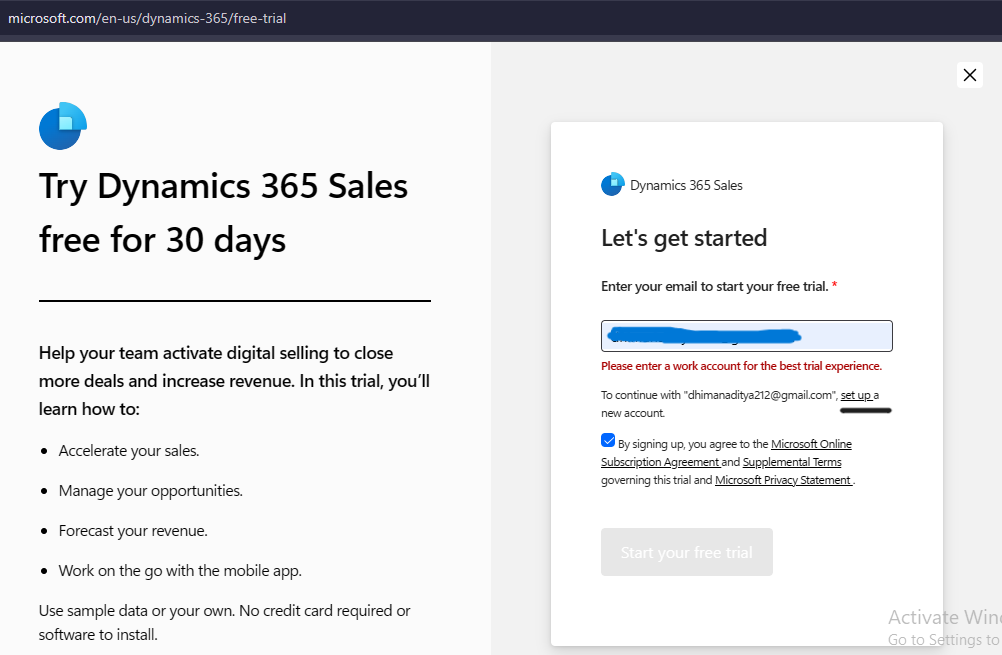
5. Fill the details and create your account , No need to pay once your account created.
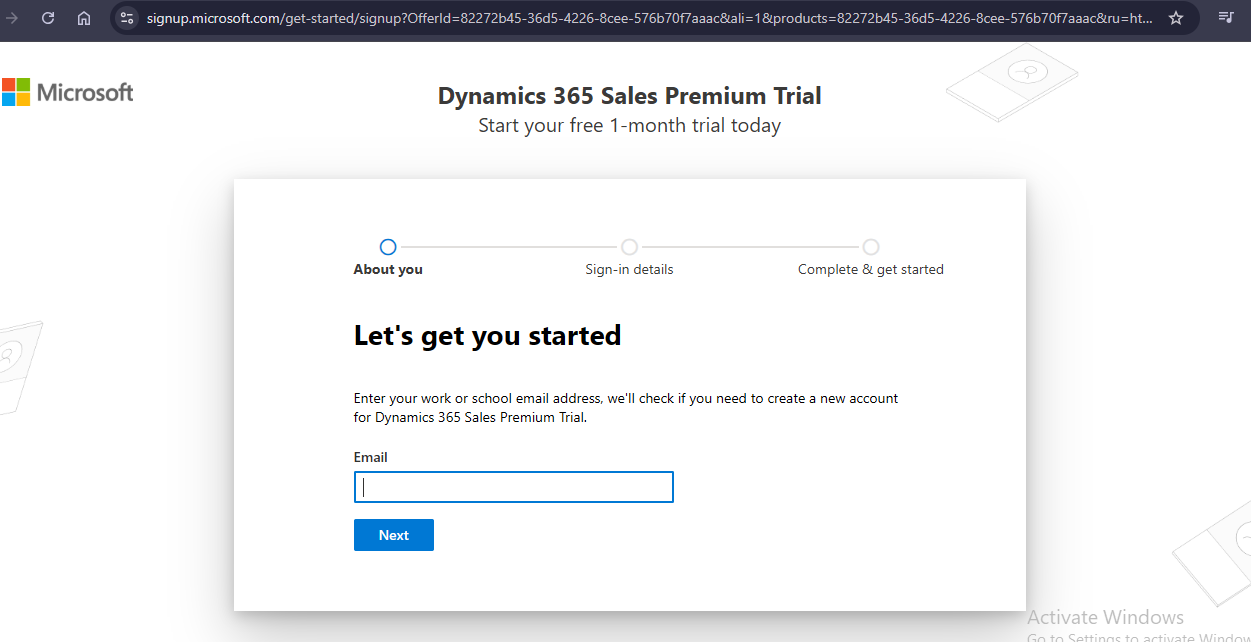
6. You get the free domain of microsoft which you can use in the power bi desktop.
Go to the signup option and sign in using the domain of microsoft enter your password and boom!!!!!!!!!
👉 Quick tip:
Power BI Desktop = where you build reports
Power BI Service (Online) = where you share and collaborate on reports
---
✅ Day 2 Recap
Today, I learned:
The basics of Data Modelling
How to install Power BI Desktop
How to create a Power BI account
So far, Power BI feels very beginner-friendly, and I’m excited to explore more features.
📅 Tomorrow in Day 3, I’ll dive into importing data and doing basic transformations in Power BI.
---